FEEDBACK
If you are interested in our products and want to know more details, please leave a message here, we will reply you as soon as possible.


You can fix faucet leaks in your bathroom fast, even if you have never fixed one before. Fixing leaks quickly is important. One drip every second can waste more than 3,000 gallons of water each year, says the EPA. Losing that much water makes your bills go up. It also hurts the environment and uses up local water. If you stop leaks right away, you save water. You also use less energy and keep your home safe from damage.
You might wonder why your bathroom faucet starts dripping out of nowhere. Most leaks happen because small parts inside the faucet wear out or get damaged. Here are some of the most common reasons:
Worn-out washers and O-rings. These tiny parts seal the water inside your faucet. Over time, they get stiff or break down, letting water escape.
Corroded valve seats. Mineral deposits and rust can build up where the faucet meets the spout, causing leaks.
High water pressure. If the water pressure in your home is too strong, it can force water through small gaps and make leaks worse.
Loose or faulty parts. Handles, seals, and other pieces can loosen or wear out from regular use or improper installation.
Incorrect washer size or installation. If someone installed the wrong size washer or put it in the wrong way, leaks can start right away.
Cracked or rusted pipes. Damage to the pipes under your sink can disrupt water flow and cause leaks at the faucet.
You see, most of these problems come from normal wear and tear. In fact, worn washers and O-rings are the most frequent reason people need to fix faucet leaks in their bathrooms. Luckily, replacing these parts is usually quick and easy.
A small drip might not seem like a big deal, but ignoring it can lead to bigger headaches. Here’s what can happen if you let a leaky faucet go:
Water damage to wood cabinets, floors, and countertops. Moisture can cause warping, swelling, and even rot.
Mold and mildew growth. Damp areas under your sink are perfect for mold, which can trigger allergies and breathing problems.
Rust and corrosion. Metal pipes and fixtures can rust, making your plumbing weaker and more likely to break.
Higher water and energy bills. Even a slow leak wastes gallons of water every day, especially if hot water is involved.
Structural damage. Water can seep into walls and floors, causing sagging, soft spots, or even foundation problems.
Pest problems. Damp spaces attract bugs and rodents, which can create even more issues in your home.
Tip: If you spot water stains, musty smells, or hear strange noises from your faucet, act fast. Fix faucet leaks early to save money and protect your home.
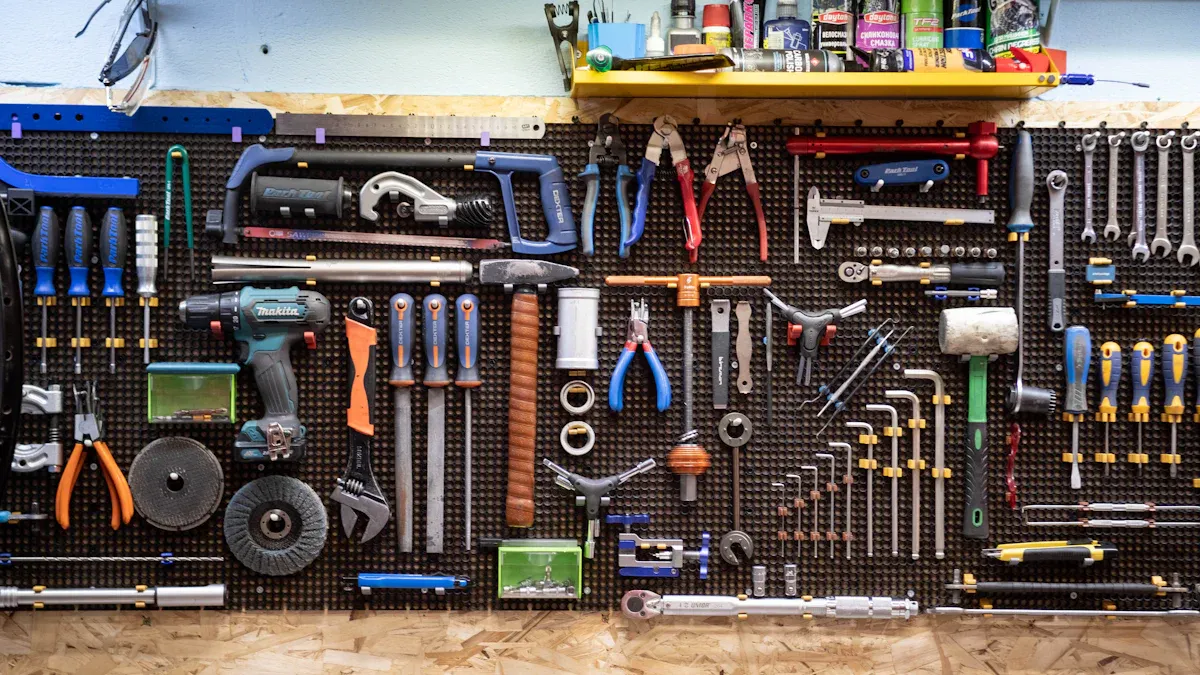
Before you start fixing your faucet, you need the right tools. Having everything ready makes the job much easier and faster. Most of these tools are easy to find at any hardware store. Here’s what you should have on hand:
Adjustable wrench
Screwdrivers (both flathead and Phillips)
Plumber’s tape (Teflon tape)
Plumber’s putty or pipe joint compound
Towels or rags
Bucket or bowl to catch water
Flashlight
Pliers (regular and needle-nose)
Utility knife
Plumber’s grease
You might not need every tool for every repair, but it’s smart to keep them close. A flashlight helps you see under the sink. Towels and a bucket catch any drips, so you don’t make a mess. Plumber’s tape and putty help seal connections and stop leaks. Plumber’s grease makes it easier to put parts back together and keeps them from sticking.
Tip: Set up a clean workspace before you begin. Lay out your tools and parts so you don’t have to search for anything in the middle of the repair.
You also need the right replacement parts. The parts you need depend on your faucet type and where the leak comes from. Here’s a quick guide to the most common parts you might need:
Replacement Part | Description | Use Case / Leak Type Addressed |
|---|---|---|
Ceramic Seats & Seals | Used with stem units | Fixes leaks from worn valve seats |
O-Rings | Rubber rings that seal connections | Stops leaks under the faucet deck |
Bonnet Nut with Valve Seal | Holds cartridge in single-handle faucets | Fixes leaks from loose or worn cartridges |
Bonnet Nuts (2) | Used in two-handle faucets | Secures cartridges, prevents leaks |
Seats & Springs (2 Each) | Small parts for non-DST faucets | Stops drips from the spout when water is off |
Repair Kit - 1H Knob/Lever | All-in-one kit for single-handle faucets | Repairs drips from spout, base, or under the handle |
You can find these parts in repair kits or buy them separately. Always check your faucet’s brand and model before buying parts. If you’re not sure, take the old part to the store and ask for help. This way, you get the right fit and fix the leak the first time.

Before you start any repair, you need to know what kind of faucet you have. Each type has its own parts and repair steps. Take a close look at your faucet and match it to the descriptions below:
Faucet Type | Visual Identification Features |
|---|---|
Single-Handle | One lever controls both water flow and temperature; sleek and minimalist design; single hole installation. |
Double-Handle | Two separate handles for hot and cold water; allows precise temperature control; traditional or modern styles. |
Vessel Sink Faucet | Tall faucet designed for vessel sinks; typically single-hole; high spout clearing the sink basin by at least 1". |
Wall-Mount Faucet | Mounted on the wall above the sink; handles and spout attached to wall; frees counter space; single or double handle. |
Widespread Faucet | Three holes with handles separate from spout; handles spaced 8" to 16" apart; flexible design; modern style. |
You might also see:
Single-handle faucets: One lever for both hot and cold water.
Double-handle faucets: Two handles, one for hot and one for cold.
Vessel faucets: Tall, with a high spout for vessel sinks.
Wall-mounted faucets: Attached to the wall, not the sink.
Knowing your faucet type helps you pick the right repair kit and follow the correct steps to fix faucet leaks.
Never skip this step! If you forget to turn off the water, you could end up with a big mess. Here’s how you do it:
Find the shut-off valves under your sink. You’ll see two—one for hot, one for cold.
Turn each valve clockwise until it stops. If they’re hard to turn, use an adjustable wrench, but don’t force it.
Turn on the faucet to make sure the water is off. No water should come out.
Place a towel or bucket under the sink to catch any drips.
Plug the drain with a stopper or rag. This keeps small parts from falling down the drain.
Tip: Always wear gloves and safety glasses. Protect your hands from sharp edges and your eyes from splashes.
Now you’re ready to take the faucet apart. Go slow and keep track of every part you remove. Here’s a step-by-step guide:
Pry off any decorative cap on the handle with a flat screwdriver.
Use a screwdriver to remove the screw inside the handle.
Gently pull the handle off. If it’s stuck, wiggle it back and forth.
Remove any collar or cover to reach the cartridge, washer, or ball assembly.
For double-handle faucets, repeat these steps for both handles.
Use pliers to unscrew the retaining nut or bonnet.
Carefully pull out the cartridge, stem, or ball assembly.
Note: Lay out the parts in the order you remove them. Take a photo if you need help remembering how to put them back.
This is where you find out what’s causing the leak. Look closely at each part:
Check washers and O-rings for cracks, flattening, or stiffness.
Look for green or white buildup on metal parts. This means corrosion.
Inspect the valve seat for grooves or pits.
Notice any loose or broken pieces.
If you see any damage, replace those parts. Always use new washers, O-rings, or cartridges that match your faucet model. For ball faucets, a repair kit with seats and springs works best. If you have a cartridge faucet and the leak won’t stop, replace the whole cartridge.
Tip: Plumber’s grease helps new O-rings and washers slide into place and last longer.
Before you put everything back together, clean all the parts. Mineral buildup can cause leaks, so don’t skip this step.
Soak metal parts in vinegar or lemon juice to dissolve hard water deposits.
Scrub with an old toothbrush or soft cloth.
Rinse and dry each part completely.
Now, reassemble the faucet:
Put new washers or O-rings in place. Use plumber’s grease for a better seal.
Slide the cartridge, stem, or ball assembly back in, making sure it lines up.
Tighten the retaining nut or bonnet, but don’t over-tighten.
Replace the handle and screw it in.
Remove the drain plug.
Turn the water supply back on slowly.
Test the faucet for leaks. If you still see drips, gently tighten connections or use plumber’s putty around the base.
Common mistakes: Forgetting to turn off the water, using the wrong parts, or not tightening everything can keep leaks coming back. Take your time and double-check each step.
You can fix faucet leaks in most bathroom faucets with these steps. If you follow this guide, you’ll save water, money, and avoid bigger plumbing problems.
Sometimes, you do everything right and the faucet still drips. Don’t worry—this happens to a lot of people. When a leak keeps coming back, you need to dig a little deeper. Start by double-checking your work. Make sure you used the right parts and tightened everything. Look for any missed washers or O-rings. Even a small mistake can keep water leaking.
Here’s a quick table to help you spot common reasons leaks stick around:
Common Cause | What to Look For |
|---|---|
Worn or damaged rubber washers | Cracks or flattening around the base or handles |
Loose or corroded pipe connections | Water under the sink or rust on pipes |
Faulty O-rings | Drips near the handle base |
Dirty or damaged aerators | Weak or uneven water flow, drips from the spout |
Broken or deteriorated cartridges | Dripping even after replacing washers |
Corroded valve seats | Leaks from the spout, green or white buildup |
Improper installation or wrong parts | Leaks right after repair |
Mineral buildup or water pressure | Hard water stains, leaks that come and go |
If you spot any of these, try cleaning parts with vinegar, tightening connections, or using plumber’s putty. Sometimes, leaks hide in the supply lines or deep inside the faucet. If you clean, replace, and tighten everything but the leak won’t stop, the faucet might have internal damage. In that case, replacing the whole faucet can save you time and money.
Tip: Always turn off the water before you start any repair. Cover the drain so you don’t lose small parts.
You can Fix Faucet Leaks yourself most of the time, but some problems need a pro. Watch for these signs:
The faucet keeps leaking after several repairs.
You see rust, cracks, or green stains around the faucet or sink.
The handle feels stiff, creaks, or won’t turn.
Water pressure drops or the faucet sputters.
You notice water under the sink or around the pipes.
The faucet is over 10 years old or looks worn out.
You want to upgrade to a new style or touchless model.
Professional plumbers use special tools to find hidden leaks and fix tough problems. They can spot issues like corroded pipes or broken valve seats that you might miss. If you see any of these signs, calling a plumber can prevent bigger problems and water damage.
Note: DIY repairs save money, but hiring a plumber gives you peace of mind. Plumbers offer warranties and make sure everything meets safety codes.
You can Fix Faucet Leaks yourself and enjoy big benefits. You save money by avoiding plumber fees and lower your water bill by stopping waste. Regular checks—at least once a year—help you catch leaks early and keep your bathroom safe. Simple steps like tightening parts or replacing washers make a huge difference. Act fast, stay confident, and you’ll protect your home while saving water for everyone.

Steel has true quality,Steel good steel need steel popular,We take the trend fashion sanitary ware market as the guidance, the first stainless steel product series in the industry
Steel has true quality,Steel good steel need steel popular,We take the trend fashion sanitary ware market as the guidance, the first stainless steel product series in the industry